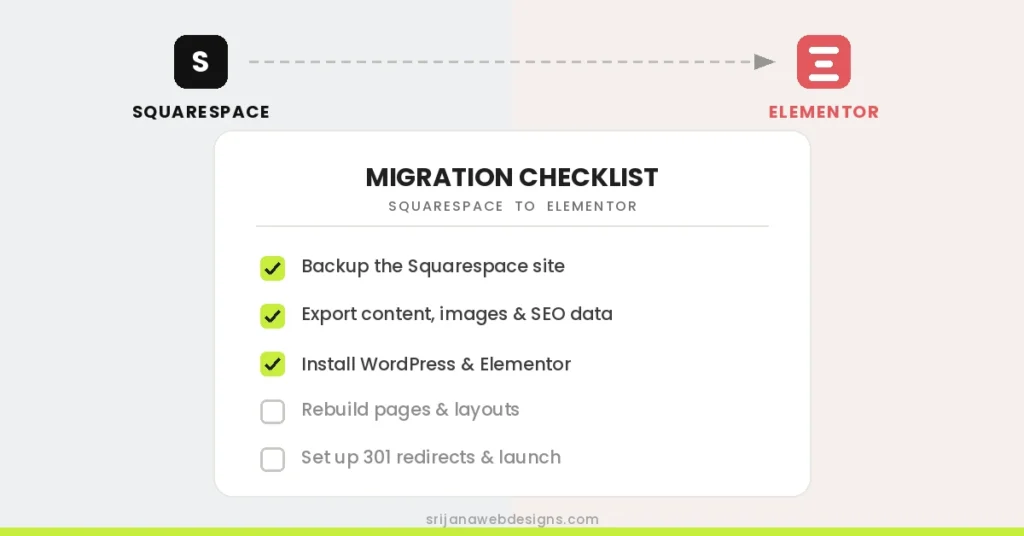
Moving a Squarespace website to WordPress with Elementor is more than exporting your content and rebuilding the design. You also need to protect your existing URLs, search visibility, images, forms, analytics, integrations, and other functionality.
If your Squarespace website already receives organic traffic, has backlinks, generates leads, or has years of content behind it, the migration deserves more planning than a simple platform switch.
This checklist walks through the process from the initial audit to the first few weeks after launch. The goal is simple: move the website to WordPress and Elementor without leaving important content, functionality, or SEO signals behind.
What Actually Happens When You Move From Squarespace to Elementor?
First, it helps to understand what you are actually migrating.
Elementor is a WordPress page builder, so there isn’t a single import button that takes an entire Squarespace website and turns it into an editable Elementor website. The practical process is usually:
Squarespace
Existing website
WordPress
New website foundation
Elementor
Design and rebuild
SEO + QA
Protect and test
Squarespace does provide an XML export that can be used to move certain content into WordPress. However, Squarespace itself states that not everything exports because some features depend on its own platform-specific technology. Its current documentation lists layout pages, one blog and certain text, image, and gallery content among the exportable items, while things such as style settings, custom CSS, certain page types, dropdowns, audio blocks, product blocks, video blocks, drafts, and some other content do not export through the XML file.
That means you should think of the export as a starting point for the content migration—not as a complete backup or a finished copy of the website.
Before You Migrate: Create a Complete Website Inventory
The easiest way to lose something during a website migration is to forget that it existed.
Before installing WordPress or exporting anything, create an inventory of the existing Squarespace website. This gives you a reference point for comparing the old and new websites later.
Start with your URLs
Record every important URL on the current website, including pages, blog posts, landing pages, downloads, and other publicly accessible content.
Your Squarespace sitemap is a useful starting point, but it should not be your only source. Also look at Google Search Console, analytics data, your site’s navigation, and important external links.
Record your most important SEO pages
- Pages receiving organic traffic
- Pages ranking for important keywords
- Pages receiving backlinks
- Pages generating leads or sales
- Popular blog posts
- Important landing pages
This is particularly important because the pages with the most business or search value should receive extra attention during the rebuild.
Record more than just pages
Your inventory should also include:
- Blog posts
- Categories and tags
- Images and galleries
- PDFs and downloadable files
- Contact forms
- Newsletter forms
- Booking systems
- Maps
- Videos
- Social embeds
- Analytics
- Tracking scripts
- Third-party integrations
- Custom code
- Any ecommerce or membership functionality
1. Crawl Your Existing Squarespace Website
Before rebuilding anything, crawl the existing website and save the results.
A crawler such as Screaming Frog or Sitebulb can help you create a more detailed record of the existing site. At minimum, you want to know which URLs exist and how those URLs currently behave.
For important pages, record:
- Current URL
- HTTP status code
- Page title
- Meta description
- H1
- Canonical URL
- Internal links
- Images
- Word count or important content sections
This crawl becomes your baseline. After the Elementor website is built, you can crawl the new site and compare the two versions instead of relying on memory.
2. Export Your Squarespace Sitemap and Search Data
A migration should be based on actual website data, not just the pages you remember building.
Check your sitemap
Use your existing XML sitemap to identify the URLs that search engines are being told about.
Check Google Search Console
Search Console can reveal pages that matter even if you don’t think of them as important. Look at your top pages, search queries, impressions, clicks, and pages receiving search traffic.
Pay particular attention to pages that generate organic traffic but are not linked prominently from the navigation.
Check analytics
Your analytics data adds another layer of information. A page may have modest search visibility but still be valuable because it converts visitors into leads.
Record useful baseline numbers such as:
- Organic sessions
- Top landing pages
- Conversions
- Form submissions
- Sales or bookings
- Popular referral pages
3. Identify the URLs That Have Backlinks
A URL isn’t valuable only because it receives traffic. It can also have authority from links on other websites.
Use Google Search Console and your preferred backlink tool to identify important pages with external links.
Give those URLs special attention when creating your redirect map. If an established Squarespace URL changes during the rebuild, the old URL should have a clear, relevant destination on the new website.
4. Make a Complete Content and Functionality Inventory
Now go beyond URLs and document what each part of the website actually does.
Content
- Pages
- Blog posts
- Categories
- Tags
- Downloads
- PDFs
Media
- Images
- Galleries
- Videos
- Audio
- Featured images
Functionality
- Contact forms
- Newsletter signup
- Booking
- Search
- Maps
- Popups
Integrations
- Google Analytics
- Google Tag Manager
- Meta Pixel
- Email marketing
- CRM
- Other third-party tools
This list becomes your migration checklist. If something exists on the current site, it should either be deliberately migrated, deliberately replaced, or deliberately removed.
5. Save Your Custom Code and Tracking Before the Migration
If you have added custom code to your Squarespace website, don’t assume it will appear in the WordPress site after importing your content.
Look for:
- Header scripts
- Footer scripts
- Custom CSS
- Analytics code
- Tracking pixels
- Embedded widgets
- Chat tools
- Custom JavaScript
Save the original code and document what each script does. During the rebuild, add only the code you still need rather than blindly copying everything into WordPress.
This is also a good opportunity to remove old tracking scripts or integrations that are no longer being used.
6. Back Up Everything Before You Start
A Squarespace XML export should not be treated as your only backup.
Squarespace’s own documentation notes that its export does not contain everything and recommends downloading or copying content such as images and text directly from the live website when necessary.
Before beginning the rebuild, save:
- The Squarespace XML export
- Your URL inventory
- Your sitemap information
- Important page content
- Important images
- PDFs and downloads
- Custom code
- SEO information
- Analytics data
- Search Console data
- DNS records
Keep the original Squarespace website active while the WordPress website is being developed and tested.
7. Set Up WordPress and Elementor on a Staging Site
Build the replacement website separately from the live Squarespace website.
Your ideal setup is:
Live Squarespace
Keep running
WordPress Staging
Build here
Testing
QA everything
Live WordPress
Launch
Set up WordPress, your theme, Elementor, your SEO system, backups, security, forms, caching, and other required tools before beginning the full rebuild.
If you’re using Elementor Pro or other Elementor-dependent functionality, make sure the required plugins and licenses are configured before rebuilding templates and pages.
8. Decide Your URL Structure Before Rebuilding Pages
This is one of the most important SEO decisions in the entire migration.
If an existing Squarespace URL is already working well, there is often little reason to change it simply because you’re moving to WordPress.
For example, if your current URL is:
and the new page can use the same URL:
keeping the URL means you have one less redirect to manage.
However, sometimes a URL needs to change because of a new site structure, content consolidation, or a deliberate SEO decision. When that happens, document the old and new URLs before launch.
Create a URL mapping sheet
| Old Squarespace URL | New WordPress URL | Action |
|---|---|---|
| /about | /about | Keep URL |
| /services | /services | Keep URL |
| /old-service | /services/new-service | 301 redirect |
| /old-post | /blog/old-post | 301 redirect |
Google recommends creating a mapping between old and new URLs when URLs change and using permanent redirects to send visitors and search engines to the appropriate new location.
9. Export Your Squarespace Content
Once your inventory is complete, you can export the content that Squarespace makes available for WordPress.
Squarespace currently provides a WordPress-compatible XML export. Its documentation says the export can include layout pages, one blog and its posts, text blocks, image blocks, certain gallery content, and some other content. It also explicitly lists several types of content that do not export through the XML file.
If your website contains content that does not export, you will need to recreate or manually transfer it during the rebuild.
10. Import the Content Into WordPress
Import the Squarespace XML into your WordPress installation using the WordPress import tools.
After the import finishes, don’t immediately move on to design. First verify what actually arrived.
Check:
- Number of pages
- Number of blog posts
- Authors
- Publication dates
- Categories
- Tags
- Images
- Links
- Embedded content
Squarespace recommends ensuring that imported images appear in the WordPress Media Library. If images are missing, they may need to be downloaded from the Squarespace site and uploaded to WordPress manually.
11. Rebuild the Website in Elementor
Once the content is safely in WordPress, begin rebuilding the website in Elementor.
Don’t think of this as trying to automatically convert Squarespace’s design into Elementor. A better approach is to use the existing website as the design and content reference while rebuilding the site properly in WordPress.
Start with the global design system
- Global colors
- Global typography
- Button styles
- Container widths
- Spacing system
- Border and radius styles
- Global heading styles
Then rebuild the global website elements
- Header
- Navigation
- Footer
- Blog templates
- Archive templates
- Popups where required
Building the global elements first makes the rest of the migration much more consistent and reduces the amount of repeated work.
12. Rebuild Pages in a Controlled Order
Don’t rebuild pages randomly. Start with the pages that matter most to the business and search traffic.
- Homepage
- Main service or product pages
- High-traffic landing pages
- About and contact pages
- Important blog templates and posts
- Lower-priority pages
For each page, compare the new version with the old one before marking it complete.
Pay attention not only to visual design but also to the information on the page. A redesign that accidentally removes useful content can change the page’s search relevance even if the new version looks better.
13. Migrate Images and Media Properly
Images are one of the areas where a migration can look successful while still being incomplete.
Every important image should be checked after migration. Make sure it exists in the new site’s Media Library and is being served by the new website rather than depending on the old Squarespace site.
Image migration checklist
- Upload important images to WordPress
- Check featured images
- Check galleries
- Check image captions where needed
- Recreate missing images manually
- Review alt text
- Optimize large files
- Check image dimensions
- Check mobile image behavior
- Check images inside blog content
Don’t use the migration as an excuse to rename every image or rewrite every alt attribute without a reason. Make improvements where they are useful, but keep the migration controlled so you can identify the cause of any post-launch problem.
14. Rebuild Forms and Other Website Functionality
A website isn’t successfully migrated just because every page loads.
If the old website generated leads through a contact form, booking form, newsletter signup, or another interaction, that functionality needs to work on the new site.
Test your forms end to end
Don’t simply check that the form appears on the page. Submit an actual test and verify the complete process.
Submit
Visitor completes form
Receive
Email or CRM receives lead
Confirm
Visitor sees confirmation
Track
Conversion is recorded
Also test:
- Booking links
- Newsletter forms
- Calendars
- Maps
- Social embeds
- Video embeds
- Chat tools
- CRM connections
- Payment functionality
- Any custom integrations
15. Reconnect Analytics and Tracking
Your new WordPress site needs to continue collecting the data you rely on.
Check every tracking system that was installed on the old site, including:
- Google Analytics
- Google Tag Manager
- Google Search Console verification
- Meta Pixel
- LinkedIn Insight Tag
- Advertising conversion tracking
- Other marketing or analytics platforms
After launch, don’t assume tracking works because the code is present. Test important events and confirm that data is actually being received.
16. Preserve Your Existing SEO
One of the biggest risks of a website migration is treating SEO as something you handle after the new design is finished.
SEO should be part of the migration from the beginning.
Review every important page
- URL
- SEO title
- Meta description
- H1
- Main page content
- Internal links
- Canonical URL
- Image alt text
- Schema markup
- Indexability
One of the easiest mistakes to make during a redesign is removing content because the new design looks cleaner.
If an existing service page contains detailed information that helps it rank, don’t reduce the page to a headline, three icons, and a contact button just because the new design is more minimal.
17. Create Your 301 Redirect Map
If an old Squarespace URL changes, visitors and search engines need a reliable path to the new URL.
This is where your URL mapping sheet becomes an actual redirect plan.
| Old URL | New URL | Redirect? |
|---|---|---|
| /services | /services | No change |
| /web-design | /website-design | 301 |
| /old-blog-post | /blog/old-blog-post | 301 |
| /discontinued-service | / | Review carefully |
Redirect to the most relevant destination
Don’t send every old URL to the homepage simply because it is convenient.
If an old service page has a direct replacement, redirect it to that service page. If several old articles have genuinely been consolidated into one comprehensive article, those old URLs may be redirected to the consolidated page.
If a page has no meaningful replacement, don’t invent one just to avoid a 404. Some content genuinely needs to disappear.
Avoid redirect chains
Ideally, an old URL should go directly to the final destination:
rather than:
Google recommends server-side permanent redirects such as 301 or 308 when technically possible and advises keeping redirect chains short.
18. Update Internal Links
Redirects are not a replacement for fixing your own links.
If your new website contains links pointing to old URLs on the same site, update them to point directly to the new URLs.
Check:
- Navigation menus
- Buttons
- Blog posts
- Footer links
- Related posts
- Service pages
- Images linked to pages
- Call-to-action sections
Google specifically recommends updating internal links during a site move rather than relying entirely on redirects.
19. Check Canonical URLs
Your new pages should tell search engines which URL is the preferred version of each page.
For a normal page migration, the canonical should generally point to the corresponding new URL rather than an old Squarespace URL.
Check for:
- Self-referencing canonicals on important pages
- Canonicals pointing to old URLs
- Incorrect canonical domains
- HTTP instead of HTTPS
- Canonical URLs that don’t return 200 status codes
20. Check Robots.txt, Noindex and Crawlability
Staging websites are often intentionally blocked from search engines. That’s fine while you’re developing—but it becomes a serious problem if those restrictions remain after launch.
Before going live, check:
- WordPress search engine visibility settings
- Robots.txt
- Page-level noindex settings
- Canonical URLs
- XML sitemap
- Important pages being crawlable
21. Generate and Check the New XML Sitemap
Your new WordPress website should have an XML sitemap containing the URLs you want search engines to discover and index.
Before submitting it, open the sitemap and check that it contains the correct production URLs—not staging URLs, redirected URLs, or pages that should not be indexed.
After launch, submit the new sitemap through Google Search Console.
22. Perform a Full Elementor Responsive Check
Rebuilding the website in Elementor introduces another layer of testing that isn’t covered by a standard content migration checklist: responsive behavior.
Desktop
- Header and navigation
- Section widths
- Typography
- Buttons
- Images
- Forms
- Spacing
Tablet
- Column stacking
- Heading sizes
- Section spacing
- Navigation behavior
- Image proportions
Mobile
- Mobile menu
- Text wrapping
- Button width
- Image cropping
- Horizontal overflow
- Form fields
- Section spacing
- Touch targets
Don’t assume that a desktop layout automatically translates well to mobile. Check the actual live page at different viewport sizes.
23. Test the New Website Before Launch
Before switching the domain, treat the WordPress website as if you were a first-time visitor.
Content QA
- All important pages exist
- Blog posts are present
- Images load
- Downloads work
- Links work
- Headings are correct
Technical QA
- HTTPS works
- Canonical URLs are correct
- XML sitemap works
- Robots.txt is correct
- No accidental noindex exists
- 404 page works
- Redirects work
Business QA
- Forms send successfully
- Email notifications arrive
- Booking links work
- Phone links work
- Social links work
- Analytics records visits
- Conversion tracking works
24. Test Every Important Redirect Before Launch
Don’t wait until after the DNS switch to discover that your redirect rules are wrong.
For every important changed URL, confirm:
| Check | Expected result |
|---|---|
| Old URL | Returns a permanent redirect |
| Redirect destination | Relevant new page |
| New page | Returns HTTP 200 |
| Redirect chain | None |
| Internal links | Point directly to new URL |
25. Launch Day: Move the Domain Carefully
Once the new website has passed your QA process, you can move the domain from the Squarespace website to the new WordPress hosting environment.
The exact DNS steps depend on your hosting provider and domain registrar, so follow the instructions for your particular setup rather than copying DNS values from another website.
Before changing DNS
- Final backup completed
- Redirects ready
- New website tested
- Forms tested
- Analytics tested
- SSL prepared
- Staging restrictions removed from the production configuration
- New sitemap ready
Immediately after the DNS change
- Open the homepage
- Open major service pages
- Open several blog posts
- Submit a test form
- Test important redirects
- Check mobile navigation
- Check HTTPS
- Check analytics
DNS changes can take time to propagate, so don’t assume that every visitor will immediately see the new server.
26. Submit the New Sitemap to Google
Once the new site is live and accessible, submit the production sitemap through Google Search Console.
For important pages, use URL Inspection to check the live URL and request indexing where appropriate.
Don’t request indexing for every URL repeatedly. The important thing is to make sure the new website is crawlable, internally linked, and represented correctly in the sitemap.
27. Monitor the First 48 Hours
The migration isn’t finished when the DNS change is complete.
The first couple of days are the time to look for obvious problems that weren’t caught during testing.
Monitor for:
- 404 errors
- Redirect failures
- Unexpected indexing issues
- Missing images
- Broken forms
- Analytics problems
- Traffic abnormalities
- Mobile layout problems
- Server errors
If you see a sudden increase in errors, investigate the specific URLs rather than making broad changes to the entire website.
28. Monitor SEO for the Next 30 Days
Google doesn’t instantly replace every old URL with every new URL. Search engines need to crawl and process the changes.
Google says temporary ranking fluctuations are normal during a site move. For medium-sized sites, processing the new URLs can take a few weeks or more depending on the number of URLs and how quickly Google can crawl the site.
During the first week
- Check Search Console regularly
- Monitor indexing
- Check redirect errors
- Check important URLs
- Monitor organic traffic
During weeks two through four
- Compare organic clicks
- Compare impressions
- Monitor ranking changes
- Look for pages losing visibility
- Check new crawl errors
- Review canonical issues
- Re-crawl the website
Don’t panic over every short-term ranking movement. A migration changes how Google accesses and processes your pages, so some fluctuation is expected. The goal is to identify persistent problems rather than reacting to every daily ranking change.
29. Update Important External Links
Redirects help visitors who follow old links, but updating important external links is still worthwhile.
Start with links that send significant referral traffic or come from important websites.
Also update links you control, such as:
- Social media profiles
- Business directories
- Author profiles
- Email templates
- Advertising campaigns
- Partner websites
- Portfolio profiles
30. Keep Your Old Redirects Active
Don’t remove your redirects a few days after the migration.
Google recommends keeping redirects in place for as long as possible and generally for at least a year when URLs have moved. From a user-experience perspective, keeping important redirects longer can also be useful because people may continue to follow old links long after the migration.
At the same time, update your own internal links and important external links so that visitors don’t have to pass through redirects unnecessarily.
Complete Squarespace to Elementor Migration Checklist
Use this condensed checklist when you’re ready to execute the migration.
Before Migration
WordPress + Elementor Setup
Content + Design Migration
SEO Migration
Launch + Monitoring
Common Squarespace to Elementor Migration Mistakes
Most migration problems aren’t caused by WordPress or Elementor themselves. They happen because an important part of the old website was never documented or tested.
1. Cancelling Squarespace too early
The old site can still be useful for checking content, downloading missing assets, and troubleshooting the migration. Keep it available until the new site is stable.
2. Assuming the XML export contains the entire website
It doesn’t. Squarespace explicitly states that certain content and settings aren’t included in the WordPress export.
3. Changing every URL during the redesign
A redesign doesn’t automatically require new URLs. If an existing URL is already useful, keeping it can simplify the migration and reduce redirect work.
4. Redirecting everything to the homepage
The destination should be relevant to the old URL. A homepage redirect is not an appropriate replacement for every unrelated page.
5. Forgetting old blog posts
Blog posts can continue receiving search traffic and backlinks years after publication. Include them in your URL inventory.
6. Leaving important images behind
A page can look fine during development while some images still depend on the old platform. Verify the actual media files.
7. Forgetting forms and integrations
A broken contact form can be much more damaging to a business than a minor visual bug. Test the complete lead-generation process.
8. Launching with staging restrictions
Check noindex settings and robots.txt before launch.
9. Skipping mobile testing
A desktop-perfect Elementor rebuild can still have broken spacing, menus, buttons, or overflowing content on mobile.
10. Assuming launch day is the end
A migration needs post-launch monitoring. Search engines still have to crawl and process the changes, and real visitors will often uncover issues that weren’t obvious during development.
A Successful Migration Is More Than a New Design
Moving a Squarespace website to Elementor gives you much more control over the design, content structure, functionality, and WordPress ecosystem. But the platform switch itself is only one part of the project.
The real challenge is moving everything that matters with it.
That means documenting the existing website, understanding which Squarespace content can actually be exported, rebuilding the design in Elementor, preserving valuable URLs, creating relevant redirects, reconnecting forms and integrations, checking technical SEO, and testing the new website before and after launch.
If the website already has organic traffic or valuable backlinks, treat the migration as an SEO project as well as a redesign project. A few hours spent building a proper URL map and pre-launch checklist can save much more time fixing avoidable problems later.
Planning a Squarespace to WordPress + Elementor migration?
If you’re moving an existing website to Elementor and want the new site to look better without leaving behind important content, functionality, or SEO work, the migration should be planned before the rebuild begins.