Elementor has a reputation for slowing down WordPress sites. Some of that reputation is earned. Some of it is entirely misplaced.
After building over a hundred WordPress websites for clients across the US, UK, and Australia, many of them with Elementor, I can tell you with confidence: the builder itself is rarely the root cause of a slow site. The root cause is usually a handful of entirely avoidable decisions made during the build.
This is not a generic list of “page builder tips.” These are the specific mistakes I see repeatedly — on client sites, on handovers from other developers, and occasionally on my own early projects. Each one has a measurable impact on load time, Core Web Vitals, and user experience.
Mistake 01 Uploading oversized, unoptimized images
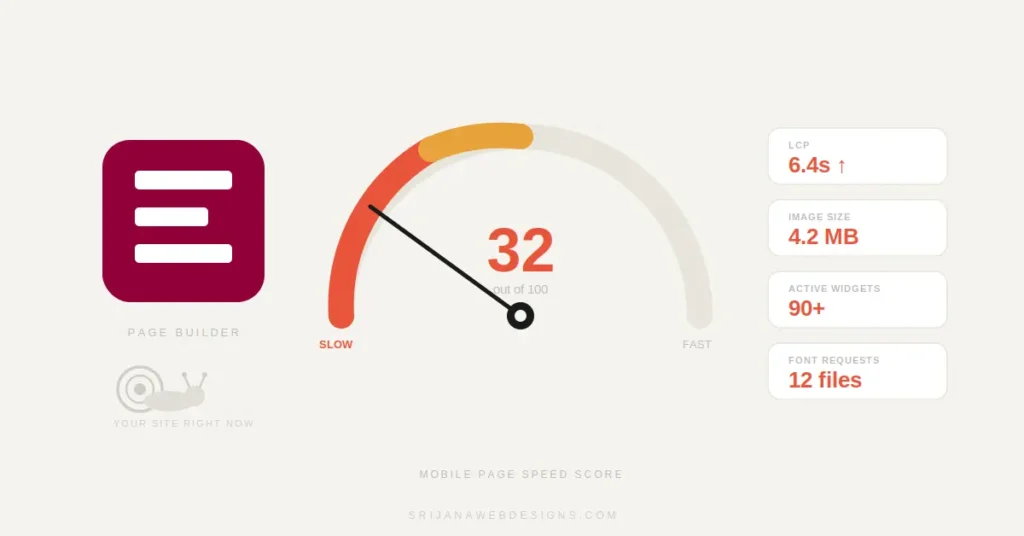
This is the single most common performance killer on any WordPress site — Elementor or otherwise. A full-width hero section with a 4MB JPEG image will drag your Largest Contentful Paint (LCP) score into the ground no matter how fast your hosting is.
Elementor makes it easy to upload images directly through the widget editor, which means many site owners upload raw phone photos or stock images without processing them first. The images look fine on screen — the damage is invisible until you run a speed test.
What makes this worse in Elementor
Elementor renders images inside its own containers, and unless you’ve explicitly configured it to use WordPress’s srcset (responsive image) feature, it may serve the same full-resolution image to mobile users as desktop users. A 2560px-wide image being loaded on a 390px screen is pure wasted bandwidth.
How to fix it
- Compress all images before uploading. Target under 200KB for full-width images, under 80KB for thumbnails.
- Convert to WebP format — typically 25–35% smaller than JPG at the same quality. Tools like Squoosh, ShortPixel, or Imagify handle this automatically.
- In Elementor’s image widget, use the correct image size — don’t upload a 3000px image and display it at 400px.
- Enable WordPress’s native lazy loading so off-screen images don’t block the initial render.
- For background images set inside Elementor sections, compress aggressively — they’re decorative and quality can drop significantly without the user noticing.
Mistake 02 Activating too many unnecessary widgets
Elementor Pro ships with over 90 widgets. By default, most or all of these are active — which means Elementor loads the CSS and JavaScript for all 90+ widgets on every page, whether your page uses them or not.
If your page uses a heading, text editor, image, button, and a contact form — you’re still loading assets for the countdown timer, the flip box, the price list, and the lottie animation. That’s unnecessary overhead on every single page load.
Where to fix this
Go to Elementor → Settings → Elements in your WordPress dashboard. You’ll see the full list of widgets. Disable every widget your site doesn’t use. This is one of the highest-impact, lowest-effort optimizations available in Elementor Pro — and one of the least discussed.
- Navigate to Elementor → Settings → Elements and toggle off unused widgets.
- Start with anything you know you’re not using: Countdown, Flip Box, Call to Action, Price Table, Slides, Lottie Widget.
- Test your pages after disabling — make sure nothing breaks visually.
- Revisit when you add new sections or page types that might require different widgets.
If you’d rather have this handled properly from day one, take a look at my Elementor design services, every build I deliver has these settings reviewed and configured before the site goes live.
Mistake 03 Using too many external fonts and font weights
Google Fonts are convenient and free. They’re also a common source of render-blocking requests. Every font family you add, and every weight variant within that family, is an additional network request the browser must resolve before text can render on screen.
In Elementor, fonts are set widget by widget. It’s easy to accidentally use three different font families — one in the heading widget, another in the text editor, a third in a button — simply because each widget was configured independently at different points during the build.
The cascading problem
Every unique font family needs its own CSS file request. Every font weight (Regular 400, Medium 500, SemiBold 600, Bold 700) is a separate file. A site that casually uses three font families with four weights each is making 12 separate font file requests on every page load. Each one delays text rendering.
- Audit your Elementor Global Settings (Site Settings → Global Fonts) and limit yourself to two font families maximum.
- In Elementor → Settings → Advanced, set the Google Font display mode to “Swap” to prevent invisible text during font load.
- Load only the weights you actually use. If you use Regular and Bold, don’t also load Light, Medium, SemiBold, and ExtraBold.
- Consider hosting fonts locally using a plugin like OMGF (Optimize My Google Fonts) — this removes the external DNS lookup entirely.
Mistake 04 Relying on render-blocking external scripts
Live chat widgets, analytics scripts, heatmap tools, social share buttons, cookie consent banners — these all add third-party JavaScript that loads during the initial page render. Each one potentially blocks or delays the browser from displaying your visible content.
This is compounded in Elementor builds because third-party scripts often get added in multiple places: through Elementor’s Custom Code feature, through a plugin, and through the theme’s header. The result is the same script loading twice, or five unrelated scripts competing for bandwidth during the critical first second of page load.
How to address this
Not all scripts can or should be removed — analytics and live chat serve real business purposes. The goal is to defer them so they load after the visible content, not before it.
- Use WP Rocket or Perfmatters to delay third-party scripts until user interaction (scrolling, clicking, or a timed delay).
- In Elementor’s Custom Code section, mark non-critical scripts as “Footer” placement rather than header.
- Audit what’s running on your pages with GTmetrix or WebPageTest — you’ll often find scripts from plugins you forgot you installed.
- Remove any script not serving an active business function. Heatmap scripts from a tool you stopped using? Delete them.
- For analytics, use the asynchronous version of your tracking codes.
Mistake 05 Not enabling Elementor’s built-in performance features
Elementor has added meaningful performance settings over the past several versions. Many site owners — and even some developers — have never touched them because they’re buried in the dashboard and weren’t there when the site was first built.
Settings worth enabling today
Navigate to Elementor → Settings → Performance and review the following:
- Improved Asset Loading: Elementor only loads CSS for widgets actually used on a given page. This can significantly reduce CSS file size. Enable it and test thoroughly.
- Inline Font Icons: Replaces the Font Awesome icon font file with individual inline SVGs. Meaningful reduction in asset weight for most sites.
- Optimized DOM Output: Reduces the number of nested wrapper divs Elementor generates around each widget. Fewer DOM nodes means faster rendering, especially on complex pages.
- CSS Print Method: Set to “External File” so browsers can cache your stylesheet between pages instead of loading it fresh each time.
Mistake 06 Installing redundant third-party Elementor plugin packs
The ecosystem around Elementor is enormous. There are dozens of add-on plugin packs — Essential Addons, Unlimited Elements, Happy Addons, Crocoblock, ElementsKit, and many more. Each one adds its own widget library, CSS files, JavaScript, and admin overhead.
The problem is not that these plugins exist — many have genuinely useful widgets. The problem is installing three of them when you need one widget from each. You end up loading the entire library of all three plugins on every page, when you’re actively using perhaps six widgets across the whole site.
The audit approach
Go through your installed Elementor add-on plugins. For each one, count how many of their widgets you actually use across your entire site. If the answer is one or two, and Elementor Pro has a reasonable alternative, remove the plugin and switch to the native widget.
- Keep only add-on plugins where you’re actively using multiple unique widgets that Elementor Pro doesn’t provide natively.
- In the add-on plugins you do keep, disable the modules/widgets you’re not using — most have their own element manager.
- Avoid installing multiple competing add-on packs “just in case.” Install when you have a specific need.
- When evaluating add-ons, check whether the plugin loads its assets globally or only on pages that use it. Per-page loading is significantly better for performance.
Mistake 07 Building on slow hosting and skipping caching
This is not an Elementor mistake specifically — but it affects Elementor sites disproportionately because Elementor generates more server-side work than a static theme. A slow server makes every Elementor page heavier. A fast server with proper caching makes those same pages load in under a second.
Shared hosting plans from budget providers often have slow Time to First Byte (TTFB) — the initial delay before the server starts sending data. No amount of image compression or widget optimisation will fix a 1.5-second TTFB. That’s a hosting problem.
Caching is not optional
Every Elementor site should have a caching plugin active. Without one, WordPress dynamically generates each page from the database on every single request. With caching, pages are served as pre-built static files — dramatically faster for both the server and the visitor.
- If your TTFB is consistently above 600ms, investigate your hosting plan — you may need to move to a managed WordPress host.
- Install and configure a caching plugin — WP Rocket, LiteSpeed Cache, or W3 Total Cache are the most widely used with Elementor.
- Enable a CDN to serve static assets — images, CSS, JavaScript — from servers closer to your visitors. Cloudflare’s free tier is a solid starting point.
- After enabling caching, clear the Elementor cache and the plugin cache together — they need to be in sync to avoid visual issues.
Mistake 08 Nesting too many sections, columns, and containers
Elementor’s Flexbox Container system (the modern replacement for the older Sections and Columns model) is far more efficient — but many sites still run the legacy structure, and many new sites are built with unnecessary nesting regardless of which system is used.
Deeply nested structures mean more DOM nodes, more CSS specificity layers, and more work for the browser’s layout engine. On mobile especially, excessive nesting can cause layout reflows that tank your Cumulative Layout Shift (CLS) score.
The practical pattern to avoid
A Section containing a Column containing an Inner Section containing another Column — just to achieve a layout that could be accomplished with two columns and padding adjustments. I see this frequently on sites built by people who discovered inner section nesting as a solution, and never considered the overhead.
- Migrate to Elementor’s Flexbox Container model if you’re still on the legacy Sections system. Use Elementor → Tools → Replace Structure.
- Audit your page structure in the Navigator panel (Ctrl + I). Anything more than three levels of nesting for a standard layout is usually over-engineering.
- Solve layout problems with padding, margins, and flex settings before reaching for inner sections.
- Avoid empty sections or columns — these still generate HTML and CSS even if they’re invisible to users.
Mistake 09 Not testing Core Web Vitals before launch
Core Web Vitals are Google’s three primary page experience signals: Largest Contentful Paint (LCP), Cumulative Layout Shift (CLS), and Interaction to Next Paint (INP). They are confirmed ranking signals — and they’re still routinely ignored by Elementor site owners until a client notices their rankings slipping.
Every issue above — unoptimized images, excessive widgets, render-blocking scripts, poor hosting — shows up clearly and measurably in Core Web Vitals scores. Running a test before launch gives you a structured checklist of what to fix before it affects real users and real search visibility.
What to test with
- Google PageSpeed Insights: Run both mobile and desktop. Mobile scores matter most for rankings. Anything below 70 on mobile deserves attention before launch.
- GTmetrix: Gives a waterfall view showing exactly what’s loading, in what order, and what’s blocking the render. Extremely useful for diagnosing slow scripts and image issues.
- Google Search Console: Post-launch, this shows real-world CWV data from actual visitors — not simulated lab scores.
- Run tests in mobile throttled mode — this simulates a mid-range phone on 4G, the worst-case scenario Google uses when evaluating your pages.
Quick-reference: all 9 Elementor mistakes and their fixes
Use this as a pre-launch checklist for any Elementor project — or for auditing an existing site.
| Mistake | Primary impact | Where to fix |
|---|---|---|
| Unoptimized images | LCP, bandwidth | Media library + ShortPixel / Imagify |
| All widgets active | Page weight, CSS bloat | Elementor → Settings → Elements |
| Too many fonts / weights | Render-blocking, FCP | Global Fonts + OMGF plugin |
| Render-blocking scripts | LCP, INP | WP Rocket / Perfmatters deferral |
| Built-in features off | CSS bloat, asset weight | Elementor → Settings → Performance |
| Redundant add-on plugins | JS/CSS overhead | Plugin audit + add-on element managers |
| Slow hosting / no cache | TTFB, overall load time | Host upgrade + WP Rocket / LiteSpeed Cache |
| Excessive nesting | DOM size, CLS | Navigator audit + Flexbox Container migration |
| No CWV testing | Rankings, UX | PageSpeed Insights + GTmetrix pre-launch |
Final thoughts
Elementor is not the problem. I’ve built fast, high-performing sites with it — and I’ve also inherited slow ones that were entirely fixable without touching the design. The difference almost always comes down to decisions made during the build, not the builder itself.
Most of the mistakes covered here don’t require a rebuild. They require an audit — a proper look at what’s actually loading, what’s redundant, and what’s been left on its default settings since day one. Start with your images, your active widgets, and your hosting. Those three alone will move the needle on most sites.
If you’ve been putting off a performance review because it feels like a big project, it usually isn’t. The settings exist. The tools are free. What’s missing is usually just the time and the knowledge of where to look — which is exactly what this guide gives you.
If your site needs more than a tune-up — if the structure itself is working against you a full website redesign built with performance as a priority from the start is often a more efficient path than patching a build that was never optimised to begin with.
And if you’re starting fresh or want an expert to take a look, get in touch directly to talk through what your site actually needs.